Just like in "The Lion, the Witch and The Wardrobe", where Lucy found a magic wardrobe that took her and her siblings to a symphonic place called Narnia, we have a magic book case in the sun room that will probably take me to a quadraphonic place called the hospital (with a hernia) if I keep on trying to move it myself.
The big bad book case was originally in the living room when we first moved in. Here's a picture of it with the previous owner's stuff. The walls aren't flesh colored anymore either. I wonder if they used to play hide and go seek naked? Shave, stand up against the wall. No one would ever find you.
One of the fun things I did prior to moving in was to take that bookcase out as well as his little brother pictured above. OK, maybe it wasn't that much fun. They were on either side of the French Doors leading out to the sun room. You can read all about those exploits here at Refreshing Refurbishment. I took the big one and "flipped" it to the opposite wall in the sun room, which is behind the LR, unless you were standing in front of it. Which then, of course, would mean it was behind you. Or you were behind it. Boy am I ever getting confused.
The little brother now stands in the garage. They are very well made book cases, they just didn't belong in the living room. We have an extra 30 square feet or so in the living room now that the book cases are residing elsewhere.
So the Big Bad Book Case has been hanging out in the Sun Room for the last 3 years. The Sun Room is essentially a walled in back deck with a lot of windows. Decking, you know, like you can see the earth below between the slats, the same stuff my lovely wife and her twin sister are standing on below. That's also the sun room behind them.
I have done a number of improvements to the sun room over the years. The first one was to make sure all the previous owner's crap was outta there, including all the stuff above. Then we could move a bunch of our own crap in. It was used as a storage area for the first year or so, and then, since my lovely wife has a penchant for buying lovely things, like antiques and such, I had to put that Gila Monster film on the windows. That stuff works great at filtering out all the bad UV light what would cause color fading on all the lovely objects of art.
After that, I started sealing out all the daylight around the windows and all the corners of the room. As I have mentioned in many previous posts, the previous homeowner was a piece of work. Some might even say Dipshit. Many of the things he did around here are still a mystery to this day. The room itself was not too bad, though I am certain he downed a twelve pack and a bottle of cough syrup before he began. A lot of daylight was sneaking in, and when the wind howled, and lot of that howling also penetrated the interior space. It stayed dry, but it was certainly drafty. Once caulked and sealed, I figured what the heck, why not toss on some paint before any real flooring came along.
Caulked, sealed and painted, we then threw down a variety of rugs and small carpets to cover the gaps in the deck and continued to utilize the space for storage.
The sun room does get used when we get a house full. It gets organized and looks about as cool as a room used for storage most of the time can. It is also used because we do have a TV (and DVD player) in that wonderful little hide-able TV space. If we get some loud, obnoxious adult banter going on in the living room, or if a SF Giants game is on the grand kids can escape to the sun room and watch movies.
With a little Vornado electric heater churning out some small but affable BTU's, the room warms up quite nicely and quickly in the cooler months. We also had a left over ceiling fan from the refurbishment days, and I installed that in the sun room last summer. You can read all about them exploits here at The Sun Room Fan. That certainly helps to cool down the room in summer, as well as bring down all that affable Vornado heat in winter.
As I mentioned, my lovely wife has a penchant for purchasing lovely things. She's also a fabulous interior decorator, so I never doubt what she's doing and that the outcome will always look awesome. She has slowly but surely been accumulating lots of lovely things for the sun room. One of them, a lovely chest needed to store all our lovely Christmas ornaments, also needed to be "chalk" painted, which is one of the newer decorating rages. I guess.
Want to know how to make your own chalk paint? I would, that's for sure, if I were to be chalk painting anything again. Ready made chalk paint is real expensive, like $37 for a quart. But my lovely wife and I did not know you could make it yourself until I had my teeth cleaned, which was after I had already painted the chest. With $37 dollar paint.
So I was having a conversation with my dental hygienist the other day, which was hard to do since her fingers were always in my mouth. So Emily did most of the talking and I mumbled a lot. I had mumbled something about this blog, and I was currently working on this post (which includes the topic of chalk paint) and wallah, Emily knew exactly what I was mumbling about. She then mentioned she had made her own chalk paint and that is how this point of discovery was made.
After a little bit of online research, I found the most used recipe/ratio seems to be:
2 cups paint (your choice and color)
5 Tablespoons Plaster of Paris
3 Tablespoons cool water
Here's a couple links if you'd like more detail on the why's and wherefores and reasons of chalk paint:
howtochalkpaint.com
inmyownstyle.com
And here's that chalk painted chest in question (it used to be stained brown):
My lovely wife also found a bird cage in a shop up in Sierraville, CA. Sierraville is up in the high Sierra, about thirty miles north of Truckee, CA. We went on a Sunday drive a year or three ago and landed upon this enchanting darling's eccentricities. An entire story could be told just upon this couple hour long encounter. To keep it short, a rusted red bird cage was acquired along with a couple other odds, ends and designer weirdness.
So the bird cage sat in the "project" portion of the garage for at least a year, and the project portion of the garage is NEVER without clutter. There's always something going on in project land. If nothing else, it's a place for stuff to hang out and scream "Do me do me do me do me" at me. Now if I were to scream that at anybody other than my lovely wife I'd probably get arrested, but inanimate objects can, apparently, say anything they want to whomever they want whenever they want. I guess it all depends on who's listening.
As is usually the case, my lovely wife kinda started painting the bird cage. And then it sat for another month or two semi painted, until I inquired if she would like me to finish the deal. Amazingly she said yes, and so I painted it all up real nice. Then, since another new decorating rage seems to be "distress" or "shabby chic", my lovely wife messed it all up. It took me 4 hours to make the bird cage look nice nice. It took my lovely wife about 4 minutes to distress it.
Sigh.
Then there's the twin bed. Fortunately, the metal twin bed frame was already shabbily chic'd and distressed and did not need me to make it look nice so my lovely wife could muss it up again. With a nice, new twin mattress and comforter with shams, it will serve as a sofa during most of the time, but can also double as a bed if you come and spend the night.
All this activity of course was leading towards completion of the sun room, which was going to involve the floor, the big bad book case and me, the under belly guy.
First of all, my lovely wife bought two rugs measuring 8x12 each, which would be more than enough to fill a room that is 12x15.5. That took care of the floor. Then she wanted that big bad book case painted to match the chalk painted chest. Fortunately we were able to use regular semi gloss paint, because at the time of inception I still hadn't had my teeth cleaned.
As with many home improvement projects, choreography was paramount. Since each rug would cover half the floor I decided to do one half of the room at a time, starting with the book case half. I had my son help me move the big bad boy, and then stacked all the rest of the sun room crap on the same side.
First of all, I prepped the last corner of the room. It was hidden from my first sealing efforts because it was behind the big bad bookcase, and I did not have my son available (nor did I want to obtain a hernia) in order to move the dang thing.
Please forgive the out of focus nature of some of these photos. Unfortunately during the different phases the camera was accidentally stuck on micro, and I didn't notice until AFTER many items were already completed. And trust me, I am definitely NOT tearing it all apart just so you can see some in focus shots. I know, how selfish of me.
I did some touch up painting and also started painting the big bad book case. I'm a great painter, can cut pretty well and deal with some pretty straight lines. But I'm also sloppy. If I can get away with not having to worry where I drip so much the better. So I dripped a little bit, and then once the touch up painting was completed, I Tyvec'd the floor.
WHAT? What the heck am I talking about? Well, at this point in the juncture we're not putting in a main line floor. Nevertheless, we still want the room as energy efficient as plausible. To that end I tacked and taped Tyvec, your basic construction house wrap, to the decking before rolling out the carpet. Again, apologies for the focus.
It was about this time, as the project was rolling along nicely, that my lovely wife informed me that she wanted some razzle dazzle on the big bad book case doors. It wasn't enough that it was getting a fresh coat and color of paint, she wanted shadow boxes on all the 6 cabinet doors. Shadow box? What the heck is a shadow box? I dunno, I think I just made it up.
So, I removed all 6 of the big bad book case doors and took them to project land in the garage with the unit's shelves and the burgeoning baseboards. It was all beginning to look like an organized mess out there. And loud? A veritable cacophony of inanimate sounds.
In order to make the shadow box doors my lovely wife envisioned, 4 thin 6 foot sticks of fancy fluff were purchased. Then I did some measuring. She wanted about a 2-2 1/2 inch edge around the box in the middle. So I did some figuring and then turned those 4 thin sticks of fancy fluff into the mess below. I also painted them all white.
I made all them little sticks with this, my trusty compound miter saw.
By the way, that's my lovely wife's red tool box on the right there. It has flowers and butterflies and stuff on it to make sure I don't mistake it for mine and go in and mess with her tools.
Once the sticks were cut and painted, especially on the inside, it was attachment time. Since the sticks were so small, I decided to forgo any tacks or small nails and just glue them to the doors. I made some more measurements, twice even, and then proceeded to glue down an "L" on each door.
Once that was dry, the next day I glued down the other "L". Amazingly enough, all the pieces fit together quite nicely if I do say so myself. I had to add weight to a couple of the sticks, and as you can see above I clamped another. But other than a couple errant sticks most all of them laid down really well.
While all this fun was going on I was continuing my dance in the sun room. Once the 6 doors were off I found I could sashay the big bad book case without too much discomfort. Or a hernia. I managed to get it into its proper place, then got the rest of the junk over to the carpeted side.
Then it was another quick touch up on the walls, Tyvec and carpet in the sun room with a little tight trim on the shadow box doors.
And wallah, the final product:
Chicken Update
It is spring, or it has sprung, and our local feed store just had Chick Days, with everything chick related at 15% off, including chicks! How could I pass up on a couple more chicks to add to our Rooster's harem?
I've got plenty of room, enough so that I could have a flock of 20 or so without any "crowding" issues. Right now we have 8 layers, and one cotten picking Rooster. Last year I tried a go at 4 Guinea Hens, and you can read all about those exploits right here: Massacre at Keet Creek
Since most hens only lay productively the first 1-4 years of their lives, I want to slowly add to our flock. I want to add 2-4 new chicks every year for a couple more years until we hit that 20 ceiling. That way we'll continue to have layers as the older one's production declines. Then we'll have to eventually weed out the non-layers, or, more than likely add on to Chicken Fantasia Land. Since I am sure we won't be able to eat or destroy our non-producing clucky girls.
We currently have 2 Buff Orpingtons, 2 Barred Plymouth Rocks, 2 Black Sex Links (which is a cross between a Rhode Island Red Rooster and a Barred Plymouth Rock hen) and 2 Red Sex Links (which are a cross between a Rhode Island Red Rooster and a White Delaware Hen.) To this ample booty we are adding a Rhode Island Red Hen, a Speckled Sussex, a Brown Americana and a Golden Sex Link, which is a cross between a Rhode Island Red Rooster and a Rhode Island White Hen.
Fowl are sex linked for several reasons. First of all, the chicks can be "sexed" just by looking at the color of their feathers, rather than pulling out a telescope and trying to find something in between their little, teeny tiny legs. Boys are one color, girls are another. Sweet. Simple. The other main reason fowl are sex linked has been to produce relatively superior egg layers. You know, the master egg laying uber race.
Our little chicks above have been named Jewell, Rosy Posey, Flash and Dash. Guess who's grandchildren chose those names? Now if only he could remember which name went with which chick.
An off the wall blog about chickens, homesteading, travel, home improvement and small town living.
Friday, April 18, 2014
Monday, March 31, 2014
Up To My Elbows in Angles
I was never very good at geometry. The only reason I passed high school geometry was because the varsity baseball coach was also the geometry teacher. Since I had to have a minimum of a C in every class to stay on the team, I got a C in geometry. I have no idea how. I don't think I passed one test. You know, like, isosceles this, you oblique, obtuse thingy.
Fortunately, my mind's eye can usually see the dimension in it's full glory without having to figure out the square root of its hypotenuse. It's also a good thing I don't have to sine or cosine when I'm hyphenating an apostrophe. I wouldn't have the foggiest notion of what I was doing.
So, I was down watering the orchard the other day a couple months ago before the rains came. Why was I watering my 4 tree orchard in the middle of January? Well, because we hadn't had any rain in these here parts for a while. So I did some drought research and learned that fruit trees should get a minimum of 5 gallons of water per week per inch of trunk. Since it really hadn't rained for a while, they were all getting a minute's worth of water.
I was going to add a few more fruit trees to the orchard this year, however, I decided not to until we get some sustained water from the sky. Eventually I'd like to have about 16-18 semi-dwarf fruit trees, a variety of course! And semi-dwarf so I don't have to climb an 80 foot ladder just to eat a peach. I'm not getting any younger you know.
Right now I have 2 peach trees, 1 Santa Rosa plum and 1 Honey Crisp apple. I'd like to add a couple more apple, a couple cherry, an apricot, a pear, a pomegranate and who knows where from there. Since we get snow at our 2200 foot elevation generally a couple times a year, citrus doesn't work so well unless you can greenhouse them. Olives do well, I may plant a couple of them. We'll see. I've got plenty of room.
It was upon this mid January watering that I noticed the hose spigot near the propane tank at the bottom of the property was leaking. Dang! We can't tolerate a water leak anywhere. We're on a well, and we're dropping a gallon of water an hour to no where for no reason? With an impending drought? This is a friggin emergency.
I have had some irrigation thoughts for this area for a while and decided, if I was going in, I was going in all the way. I had most of the materials, you have to when you live in the country, but headed into town for a few more just in case. I loaded up on PVC fittings from Restore, a recycling place, and then went to a local hardware store for a couple more specific items.
When I returned, I got all my tools and all the materials together and trucked on down to the lower 40. Besides fixing the leak, I wanted the leaking hose bib attached to a post. I have another hose bib up near the parking area that is simple PVC rising, like this, and a strong tug on the hose broke it right off one morning. Then I had 15 foot geyser and a frantic chase to figure out where the nearest shut-off might be. Turned out that one I had to turn off at the well. Dang. I had to shut off the entire house. Everything. Everywhere. And then I did not have the needed PVC fitting, so I picked up several when I went to the store. Just in case there's a next time.
Seems that when they punched in the new well some years back they made a couple outlets directly off the main line coming up to the house. So if something goes south on that line I've got to shut it down at the well. On the other side of the property, I've got one shut off that only affects outside water and does not effect the house. That is fabulous when there is an upcoming freeze. I can turn off most of the exterior water outlets at one location.
So if I am securing the bib to a post, I'm gonna need a post, which would also require a hole, a short 4x4 and some concrete. But then, before I even went there, I decided to install a shut-off valve at the bottom of the hill. That way the rest of the line, and there are about a half dozen other branches off that line, can remain active whenever I might have to work on the irrigation in the orchard.
First I shut off the water at the top of the hill. Then I dug around the existing bib, which is located next to the propane tank, about 250 feet downhill from the house. That was one thing the previous owner idiot boy did that was good. He had the propane tank located down near the road, which not only makes it safer for the house but keeps those heavy propane tankers off most of our Lombard Street drive. He did a few good improvements, maybe 4 or 5. And about 4 or 500 WTF'S.
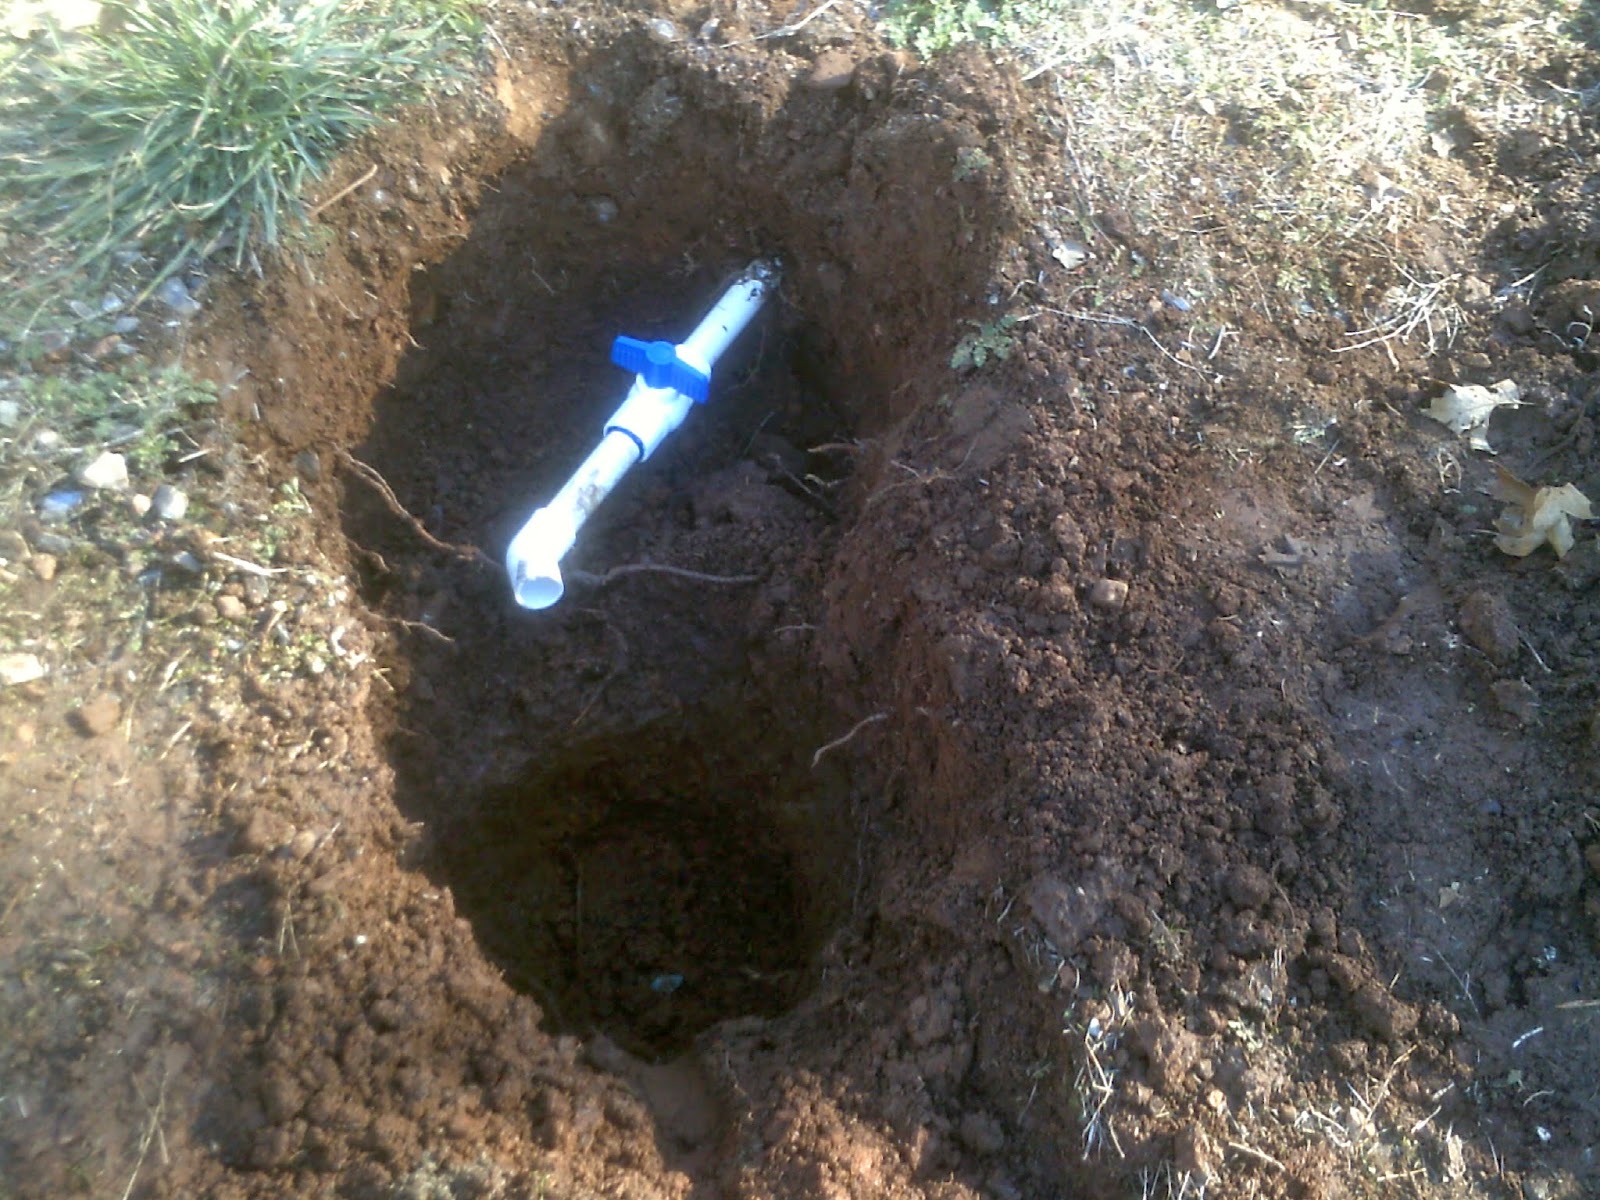
After digging for a minute or two, I carefully uncovered the end of the line and the 90 degree elbow swinging up to the attached bib.
I removed the bib for reuse, dug the hole for the post, and then dug back a little on the existing line to allow room for the shut-off valve. Then I got my PVC snippers in and cut the line. By the way, the notorious, hard foothill clay slices like butter when wet. Remember the bib had been leaking?
Once that was done, I slathered PVC cement on one of the female ends of the valve and put it on the line.
Now I had a shut-off valve at the bottom of the hill. Boom.
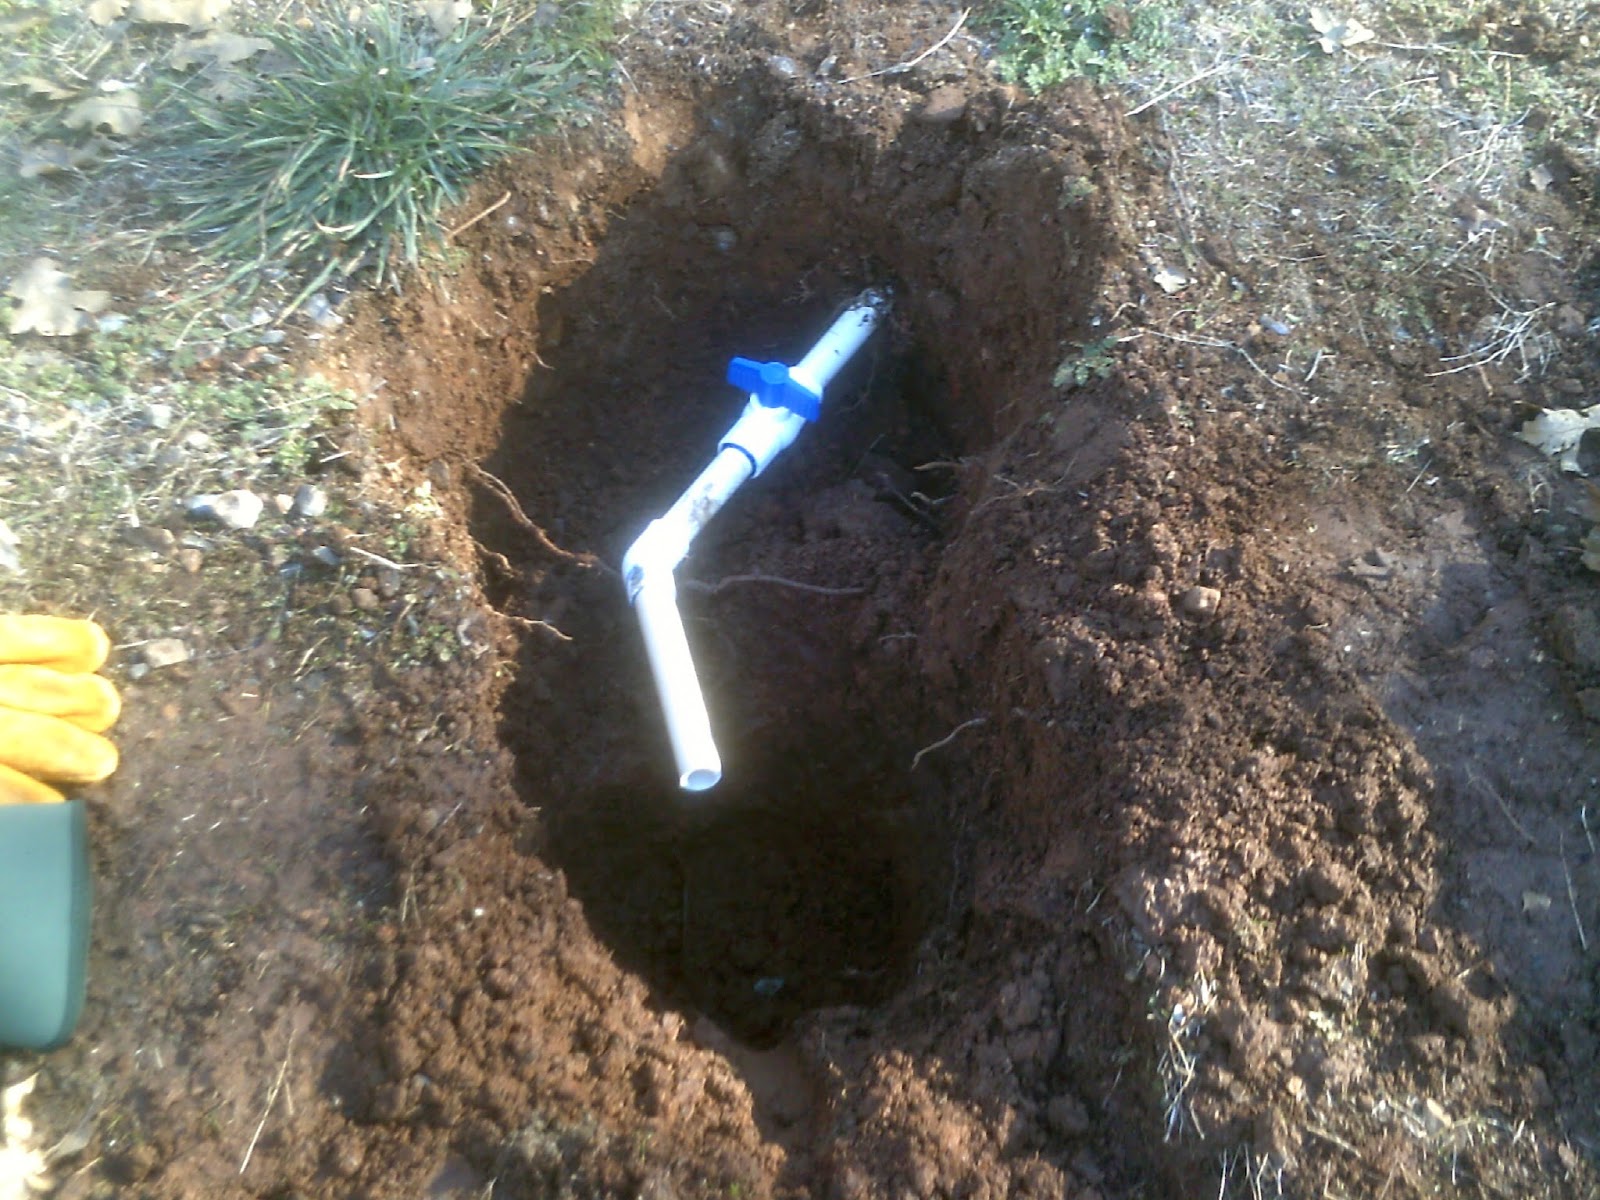
Next was a little 45 degree action so the line would run right next to the post and also meet up with the trenching across the lower gravel drive. Eye-ball to angle. Scalene that, baby.
Next I put the round housing unit over the valve for protection, just in case. There was a lot of activity going on. It also made for a nice radius. Or ulna. With a diameter in between.
Then I added a "T", a 3 foot rise and a 10 foot section horizontally so I wouldn't get any dirt in the end. Oh, yeah, I also popped in the post to size it all up. That would be my own ambiguous theorem.
Once everything looked OK, I mixed up some concrete, filled the hole, leveled the post and called it a day.
The next day, after the concrete had dried, I came back to play. Once I had attached the riser and bib to the post, I discovered I had a bit of an elevation thing going on in the trenches. PVC will bend, but it's got to be a gentle curve. What I had going on was too extreme and was going to require some mumbo jumbo. Some angularity. You know, geometry. First I had to cut the 10 foot section right where the drop began.
And then I mumbo'd and jumbo'd with a couple of 45's. Kind of like doing a hypotenuse trapezoid or a hexigonal diagonoid. You know, it almost sounds like I'm making this up.
And then I ran the line through the trench I had scratched across the drive, ending just on the opposite side of the cedar wall you'll be introduced to shortly. I glued an end cap on the line, covered the trench and called it a day.
Here's the finished part of that project for the then moment-
I quickly discovered it was a pain in the patoot trying to turn on the water with that valve when it was up against the post, so I cut off the post with my trusty hand saw and this is the final result after a coat of brown paint.
Another good thing the previous owner homeboy moron did was start a partial line of cedar trees that run parallel to the main road and act like a bit of a hedge of privacy for the front of the house.
Unfortunately, due to some oaks impinging on their territory, there are several bald spots along this hedge. I picked up a few volunteer starts, like 30 or so from a friend's place a couple years ago. I promptly potted them and have expanded their pot size a couple times. Since the ground had been saturated with about 18 inches of rain in the last month in a half I figured it was time to set a few free. Fifteen of them made it into the ground to fill in the vacancies. Once established, they should grow a foot or two each year.
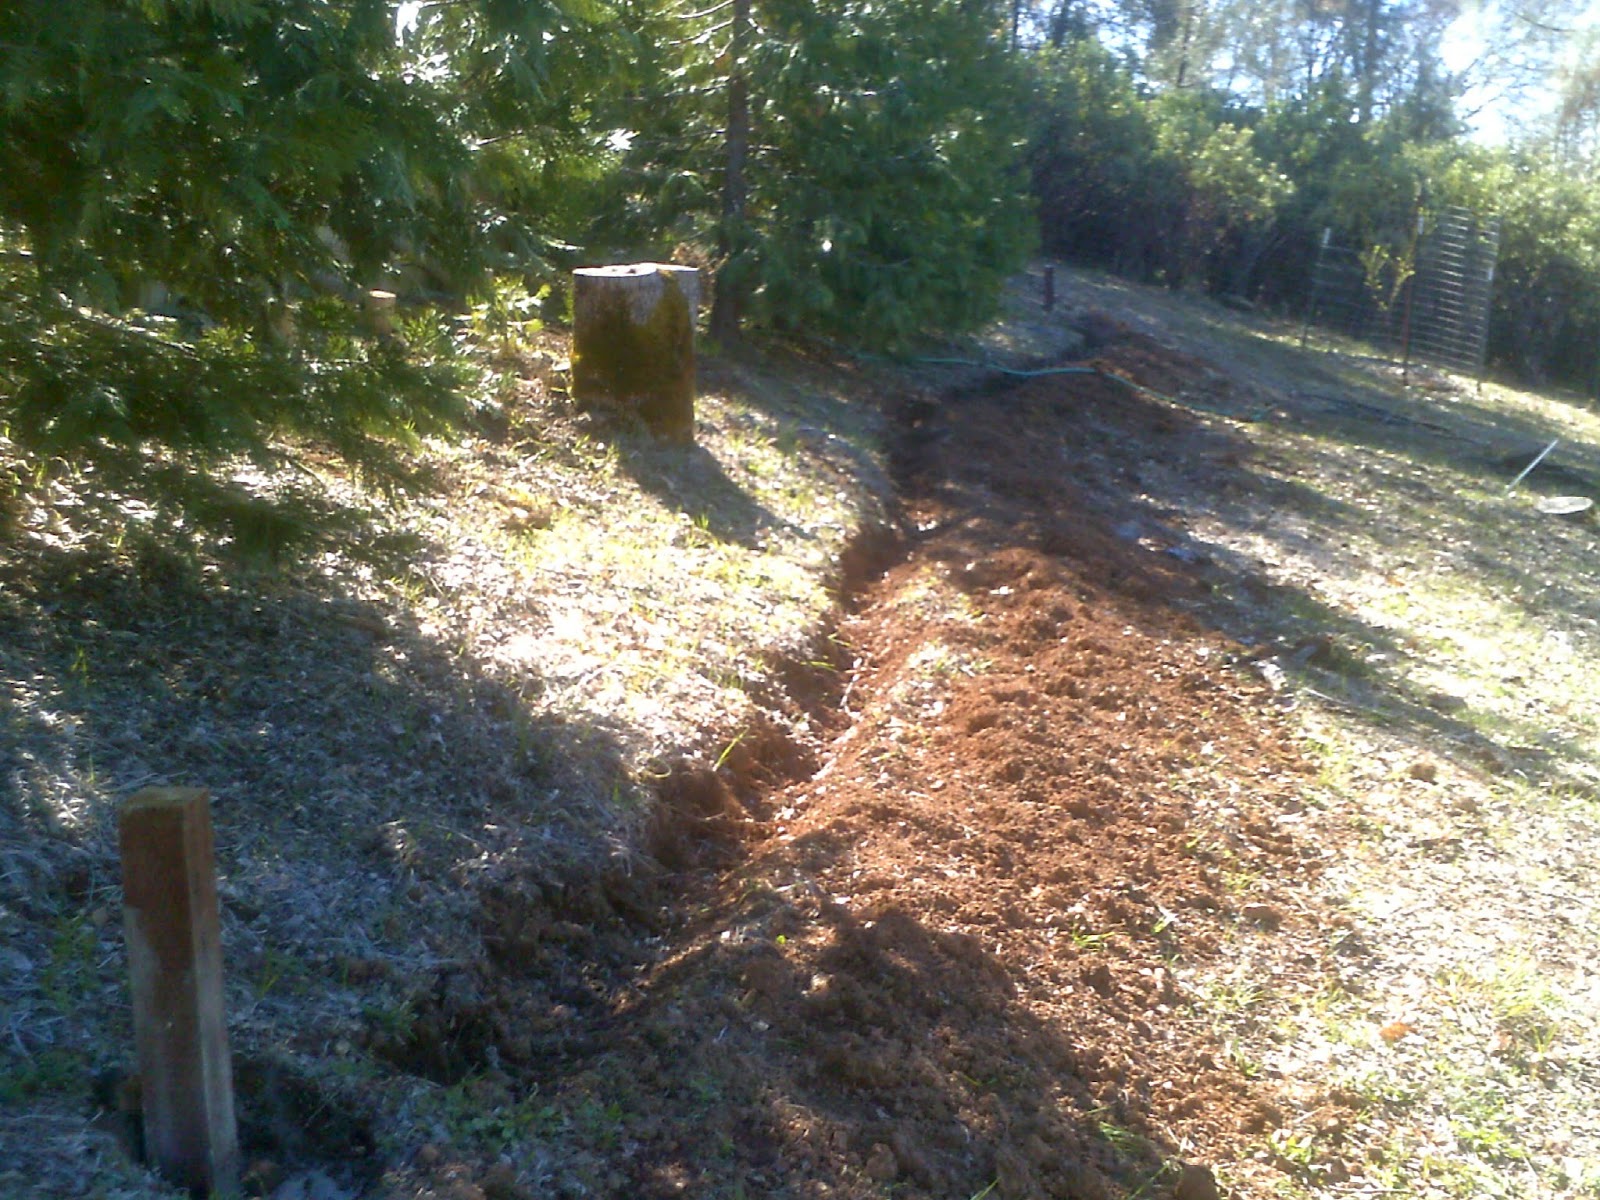
And since the ground had been so saturated and was so soft, I decided to dig the trenches to complete the orchard irrigation.
It all seemed more or less straight when I was digging, but it ended up not quite being the straightest of lines. It's kinda how I operate tho. With just a wee bit of a soft edge. It almost looks like the line is smiling towards the west. Or maybe it can be a mustache. Who cares? It's all covered now anyway.
And then I left it all for the day to let the concrete dry. Actually, I think it was another week or so before I got down to run the lines.
FIRST, I turned off the water at my newly installed valve, not the top of the hill. And then I had to locate the capped end I had buried so many weeks back. Fortunately, I stacked a couple rocks a the location and it was a snap to find.
Then it was snip, let the line drain (since this was it's lowest point),"T" time and run the line to each side. (The above supply line was left somewhere near the middle of the orchard.)
I made sure there was enough line at each post.
I had to do MORE geometry at each end due to elevation changes, but it all went acutely well.
Once everything was attached I tested the line and fixed 2 leaks. Then I retested the line and let the water stay on for 5 minutes. Everything held. I tossed a little dirt on the line and added a little brown paint on the risers.
By this time, most all of the muscles in my body were aching. I had been doing physical hard stuff for two days straight and this old body was barking. Usually I try to space out the hard stuff, but every once in a while days collide. My back, my shoulders, my thighs and Steve, my ankle, were howling.
Hobbling along, I gathered all my tools and equipment, tossed them in the truck and drove back up to the house. With every fiber aching, I shuffled around and put the stuff away (every thing has a place and every place has a thing-one of my rules to live by), shuffled into the garage, sat down and freed Ed and Steve, my ankles, from their very safe housing units. Or boots. I suppose most folks refer to them things as boots.
I shuffled inside, popped about 18 Ibu's, showered and sang Babaloo. It felt good to be square again.
Animal Update
The kittens have taken a shine to scampering outdoors first thing in the morning. It's usually still a wee bit dark, and it usually happens when I open the front door to empty the wood stove ashes and get some kindling. We're still lighting fires here in the morning to take the chill off. Actually, today will be a day long fire, it is raining as I write. With possible snow tonight at the 2500 foot elevation level.
Once the fire is started and the coffee is dripping, I usually yawn and wake up. Then I'll pour some coffee, clean out the cat box and toss that and the recycle out the utility door for future deportation to the garbage depot. When it's light outside.
One morning a couple days ago I was a little delinquent with the recycle and it was light by the time I opened the utility door. And there. laid out ever so neatly, was a dead little bird. A present from one of our little girl kittens to be sure. I have witnessed them attacking a lot of bugs, and now one of our feathered friends has made their list. The first, but certainly not the last. Now if I could only train them to attack deer.
It would be nice if they could restrict their hunting prowess to our four legged furry little rodent friends, but unfortunately that would not be the case. I fear a fair amount of feathers will fly during their lifetime(s).
Our intrepid hunter Tom Cat caught birds all the time. Ate 'em too. Ate everything except the beak and legs. Then he'd burp feathers, just like Sylvester. I'm kidding about the feather burping part. But not about the beak and legs.
I also pity any lizards around here this summer and for the summers to come. Those that do live will certainly be tail less, which is probably better than being clueless. And they don't shake their tail that much anyway, I don't think lizards listen to very exciting music.
They probably listen to really insipid stuff, like that Pina Colada Song.
OK, if you listened to that then you certainly can't let that be the last tune to twirl about your cranium. Try this relatively new one out from Toad the Wet Sprocket. The kitties both really like this song and listen to it all the time while they're tearing up the living room.
Fortunately, my mind's eye can usually see the dimension in it's full glory without having to figure out the square root of its hypotenuse. It's also a good thing I don't have to sine or cosine when I'm hyphenating an apostrophe. I wouldn't have the foggiest notion of what I was doing.
So, I was down watering the orchard the other day a couple months ago before the rains came. Why was I watering my 4 tree orchard in the middle of January? Well, because we hadn't had any rain in these here parts for a while. So I did some drought research and learned that fruit trees should get a minimum of 5 gallons of water per week per inch of trunk. Since it really hadn't rained for a while, they were all getting a minute's worth of water.
I was going to add a few more fruit trees to the orchard this year, however, I decided not to until we get some sustained water from the sky. Eventually I'd like to have about 16-18 semi-dwarf fruit trees, a variety of course! And semi-dwarf so I don't have to climb an 80 foot ladder just to eat a peach. I'm not getting any younger you know.
Right now I have 2 peach trees, 1 Santa Rosa plum and 1 Honey Crisp apple. I'd like to add a couple more apple, a couple cherry, an apricot, a pear, a pomegranate and who knows where from there. Since we get snow at our 2200 foot elevation generally a couple times a year, citrus doesn't work so well unless you can greenhouse them. Olives do well, I may plant a couple of them. We'll see. I've got plenty of room.
Here's our two peach trees below, you can just make out the January blossoms. The Perez peach, so named for the good friend that gave it to us, is the one in the background. Last year it bore fruit, a half dozen sumptuous, delicious white peaches. Lots of blooms were danced upon by bees this year, and so far we haven't had a freeze since they blossomed. Hopefully we'll have a bit larger bounty this year. We've got a couple established fruit trees by the house that haven't bore fruit since we've been here. In the last 3 years as soon as they blossomed snow came and froze the giblets. It's been a warmer Late Winter Early Spring this year.
Oh yeah, in case you haven't noticed, all our fruit trees are encased with a 6 foot high fence. Until they get a bit taller. If they weren't encased the dang deer would reduce them to rubble in a heartbeat. You can read more about our deer problems here at Bambi Can Eat My Drawers.
I have had some irrigation thoughts for this area for a while and decided, if I was going in, I was going in all the way. I had most of the materials, you have to when you live in the country, but headed into town for a few more just in case. I loaded up on PVC fittings from Restore, a recycling place, and then went to a local hardware store for a couple more specific items.
When I returned, I got all my tools and all the materials together and trucked on down to the lower 40. Besides fixing the leak, I wanted the leaking hose bib attached to a post. I have another hose bib up near the parking area that is simple PVC rising, like this, and a strong tug on the hose broke it right off one morning. Then I had 15 foot geyser and a frantic chase to figure out where the nearest shut-off might be. Turned out that one I had to turn off at the well. Dang. I had to shut off the entire house. Everything. Everywhere. And then I did not have the needed PVC fitting, so I picked up several when I went to the store. Just in case there's a next time.
Seems that when they punched in the new well some years back they made a couple outlets directly off the main line coming up to the house. So if something goes south on that line I've got to shut it down at the well. On the other side of the property, I've got one shut off that only affects outside water and does not effect the house. That is fabulous when there is an upcoming freeze. I can turn off most of the exterior water outlets at one location.
So if I am securing the bib to a post, I'm gonna need a post, which would also require a hole, a short 4x4 and some concrete. But then, before I even went there, I decided to install a shut-off valve at the bottom of the hill. That way the rest of the line, and there are about a half dozen other branches off that line, can remain active whenever I might have to work on the irrigation in the orchard.
First I shut off the water at the top of the hill. Then I dug around the existing bib, which is located next to the propane tank, about 250 feet downhill from the house. That was one thing the previous owner idiot boy did that was good. He had the propane tank located down near the road, which not only makes it safer for the house but keeps those heavy propane tankers off most of our Lombard Street drive. He did a few good improvements, maybe 4 or 5. And about 4 or 500 WTF'S.
After digging for a minute or two, I carefully uncovered the end of the line and the 90 degree elbow swinging up to the attached bib.
I removed the bib for reuse, dug the hole for the post, and then dug back a little on the existing line to allow room for the shut-off valve. Then I got my PVC snippers in and cut the line. By the way, the notorious, hard foothill clay slices like butter when wet. Remember the bib had been leaking?
Once that was done, I slathered PVC cement on one of the female ends of the valve and put it on the line.
Now I had a shut-off valve at the bottom of the hill. Boom.
Next was a little 45 degree action so the line would run right next to the post and also meet up with the trenching across the lower gravel drive. Eye-ball to angle. Scalene that, baby.
Next I put the round housing unit over the valve for protection, just in case. There was a lot of activity going on. It also made for a nice radius. Or ulna. With a diameter in between.
Then I added a "T", a 3 foot rise and a 10 foot section horizontally so I wouldn't get any dirt in the end. Oh, yeah, I also popped in the post to size it all up. That would be my own ambiguous theorem.
Once everything looked OK, I mixed up some concrete, filled the hole, leveled the post and called it a day.
The next day, after the concrete had dried, I came back to play. Once I had attached the riser and bib to the post, I discovered I had a bit of an elevation thing going on in the trenches. PVC will bend, but it's got to be a gentle curve. What I had going on was too extreme and was going to require some mumbo jumbo. Some angularity. You know, geometry. First I had to cut the 10 foot section right where the drop began.
And then I mumbo'd and jumbo'd with a couple of 45's. Kind of like doing a hypotenuse trapezoid or a hexigonal diagonoid. You know, it almost sounds like I'm making this up.
And then I ran the line through the trench I had scratched across the drive, ending just on the opposite side of the cedar wall you'll be introduced to shortly. I glued an end cap on the line, covered the trench and called it a day.
Here's the finished part of that project for the then moment-
I quickly discovered it was a pain in the patoot trying to turn on the water with that valve when it was up against the post, so I cut off the post with my trusty hand saw and this is the final result after a coat of brown paint.
Another good thing the previous owner homeboy moron did was start a partial line of cedar trees that run parallel to the main road and act like a bit of a hedge of privacy for the front of the house.
Unfortunately, due to some oaks impinging on their territory, there are several bald spots along this hedge. I picked up a few volunteer starts, like 30 or so from a friend's place a couple years ago. I promptly potted them and have expanded their pot size a couple times. Since the ground had been saturated with about 18 inches of rain in the last month in a half I figured it was time to set a few free. Fifteen of them made it into the ground to fill in the vacancies. Once established, they should grow a foot or two each year.
And since the ground had been so saturated and was so soft, I decided to dig the trenches to complete the orchard irrigation.
And so I dug, as straight as I conceivably could, without running a line. And since the ground was so soft, I decided to dig the holes and put in the posts for the two hose bibs on either side of the orchard I had envisioned somehow somewhere. I got lost in a pure excavating frenzy. Have shovel, will dig.
And then I left it all for the day to let the concrete dry. Actually, I think it was another week or so before I got down to run the lines.
FIRST, I turned off the water at my newly installed valve, not the top of the hill. And then I had to locate the capped end I had buried so many weeks back. Fortunately, I stacked a couple rocks a the location and it was a snap to find.
Then it was snip, let the line drain (since this was it's lowest point),"T" time and run the line to each side. (The above supply line was left somewhere near the middle of the orchard.)
I made sure there was enough line at each post.
I had to do MORE geometry at each end due to elevation changes, but it all went acutely well.
Once everything was attached I tested the line and fixed 2 leaks. Then I retested the line and let the water stay on for 5 minutes. Everything held. I tossed a little dirt on the line and added a little brown paint on the risers.
By this time, most all of the muscles in my body were aching. I had been doing physical hard stuff for two days straight and this old body was barking. Usually I try to space out the hard stuff, but every once in a while days collide. My back, my shoulders, my thighs and Steve, my ankle, were howling.
Hobbling along, I gathered all my tools and equipment, tossed them in the truck and drove back up to the house. With every fiber aching, I shuffled around and put the stuff away (every thing has a place and every place has a thing-one of my rules to live by), shuffled into the garage, sat down and freed Ed and Steve, my ankles, from their very safe housing units. Or boots. I suppose most folks refer to them things as boots.
I shuffled inside, popped about 18 Ibu's, showered and sang Babaloo. It felt good to be square again.
Animal Update
The kittens have taken a shine to scampering outdoors first thing in the morning. It's usually still a wee bit dark, and it usually happens when I open the front door to empty the wood stove ashes and get some kindling. We're still lighting fires here in the morning to take the chill off. Actually, today will be a day long fire, it is raining as I write. With possible snow tonight at the 2500 foot elevation level.
Once the fire is started and the coffee is dripping, I usually yawn and wake up. Then I'll pour some coffee, clean out the cat box and toss that and the recycle out the utility door for future deportation to the garbage depot. When it's light outside.
One morning a couple days ago I was a little delinquent with the recycle and it was light by the time I opened the utility door. And there. laid out ever so neatly, was a dead little bird. A present from one of our little girl kittens to be sure. I have witnessed them attacking a lot of bugs, and now one of our feathered friends has made their list. The first, but certainly not the last. Now if I could only train them to attack deer.
It would be nice if they could restrict their hunting prowess to our four legged furry little rodent friends, but unfortunately that would not be the case. I fear a fair amount of feathers will fly during their lifetime(s).
Our intrepid hunter Tom Cat caught birds all the time. Ate 'em too. Ate everything except the beak and legs. Then he'd burp feathers, just like Sylvester. I'm kidding about the feather burping part. But not about the beak and legs.
I also pity any lizards around here this summer and for the summers to come. Those that do live will certainly be tail less, which is probably better than being clueless. And they don't shake their tail that much anyway, I don't think lizards listen to very exciting music.
They probably listen to really insipid stuff, like that Pina Colada Song.
OK, if you listened to that then you certainly can't let that be the last tune to twirl about your cranium. Try this relatively new one out from Toad the Wet Sprocket. The kitties both really like this song and listen to it all the time while they're tearing up the living room.
Subscribe to:
Posts (Atom)